
Javascript is a powerful programming language that can make web pages more interactive. It’s a popular substitute for Flash, which means that any devices that don’t have flash support can still access your website. In this blog-post I try to recreate a popular Flash game- The dressup game using some JavaScript, HTML and CSS. The code for this is also provided at the end, in case you’d like to make your own.
Getting Started
The Editor : To write my code I used Brackets, a free HTML editor that’s also available on Linux.
The Images: I sketched out my images in Krita, a powerful painting program that’s completely free and open source and of course also available on Linux.
Creating and prepping the images
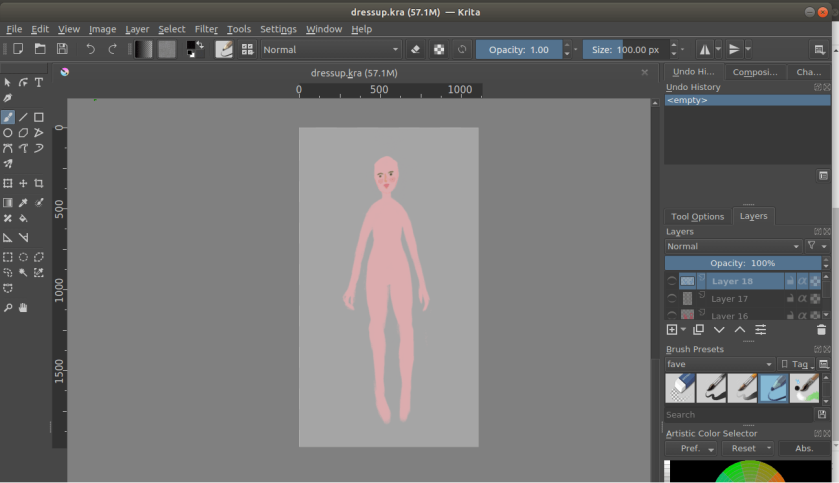
Firstly I painted a quick silhouette of a human to serve as a proto-mannequin
Next I created new layers for each element (dresses,shoes etc) and painted the respective elements on those layers
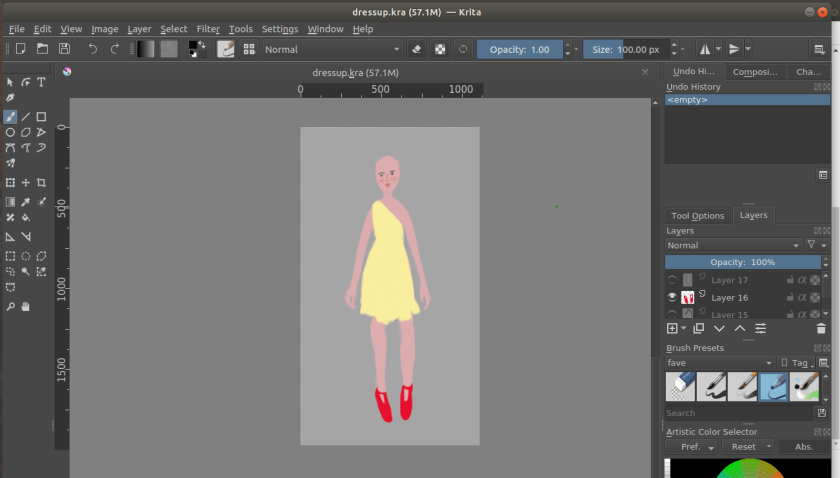
In the above image, the layers for the yellow dress and red shoes are visible while the rest are not
For the hair: I simply created separate layers for the hair front and hair back ( The hair_back layer goes behind the body while the hair_front goes in front of the body)
Finally I cropped the image to how big I wanted my canvas( in the final game) to be and saved each layer separately as a png image. Make sure the background is set to transparent when you save it as a png.
Note that each of the images are of the same dimensions, and this is so that they line up properly on top of the body when stacked over each other


The dimension of each image is 555 x 987px. This is important as we’ll use this later to create a proper layout for our images.
Setting up the workflow
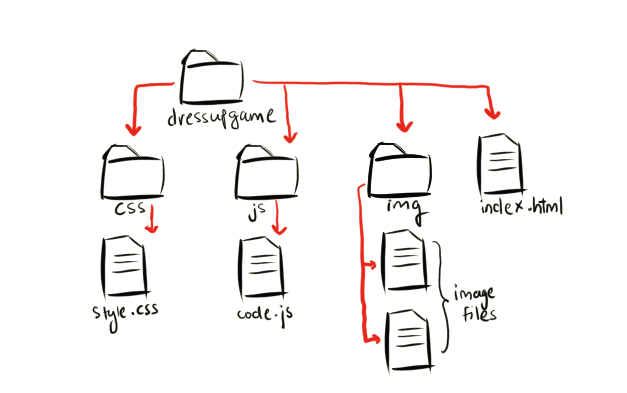
Since my code consists of three separate files ( an HTML file, a stylesheet and a javascript file), I created a directory called dressupgame. Within it, I created three subfolders called css, js and img respectively, and saves the files within them so the directory structure looks something like this:
The next part is divided into three subsections: creating the html layout, styling everything with css and finally programming the game using javascript.
Part 1 : The HTML:
First I created a file called index. html which serves as the main landing page.
Within this file, the first thing I did was to link the CSS file.
Secondly I created several divs to hold the various elements of the game( dress, shoes, body etc..) with corresponding div id’s.
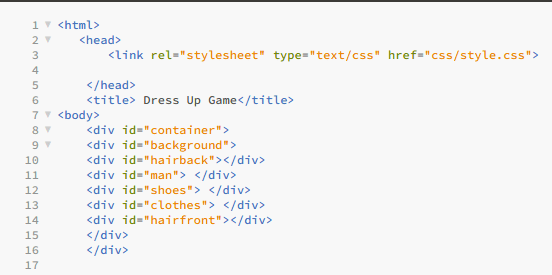
Notice that in the above code the background div is within the container div and all other divs are within the background div. This comes in handy when positioning the divs with CSS.
Next I created three buttons that would change the hair, shoes and dress respectively and set their onclick value to a function which we will create later. I put these inside the container div but outside the background div.
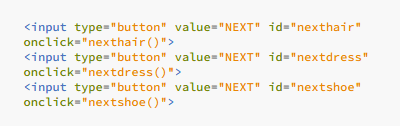
Finally, add the script tags to link the javascript file before closing the body tags

The final code looks something like this:

Part 2: The CSS :
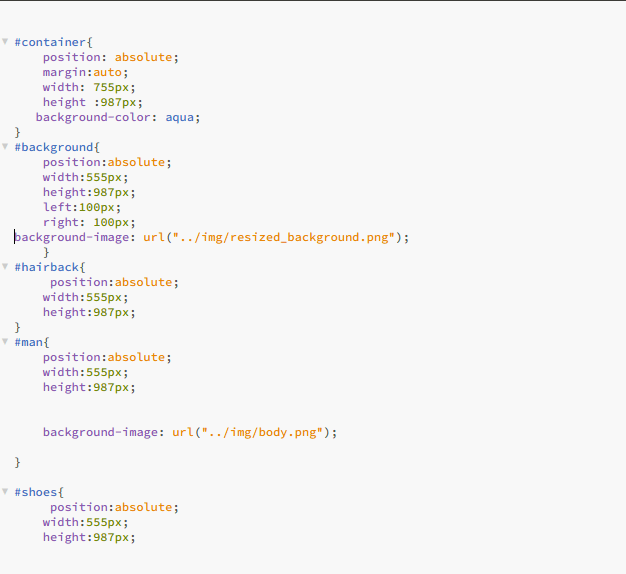
In order to make sure that the images line up properly, I styled all the divs so that they were in the same position and of the same height and width.(with the exception of the container div)
To do this first I declared the width and height of each div to be 555px and 987px respectively, since this was the dimensions of each image.
Then I set the width of the container div to be 200px wider than all the divs that lay inside it, but of the same height.
Lastly I set the position of each div to to absolute, and offset all the divs that would contain my images, 100px from the left and right so that they all lay in the centre.
I also set both the background images of the #man div (contains the mannequin) and the #background div so that they both show up on loading the page
Now I made different classes for each element of the game and set their background image property to the image so that I could later add these classes to the divs in order to make them show up on the screen. These classes were also of the same height and width as my images and I set their position to absolute.
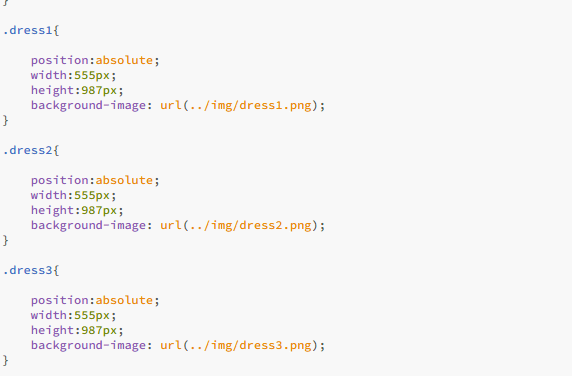
I continued this for the shoes, hairfront and hairback too.
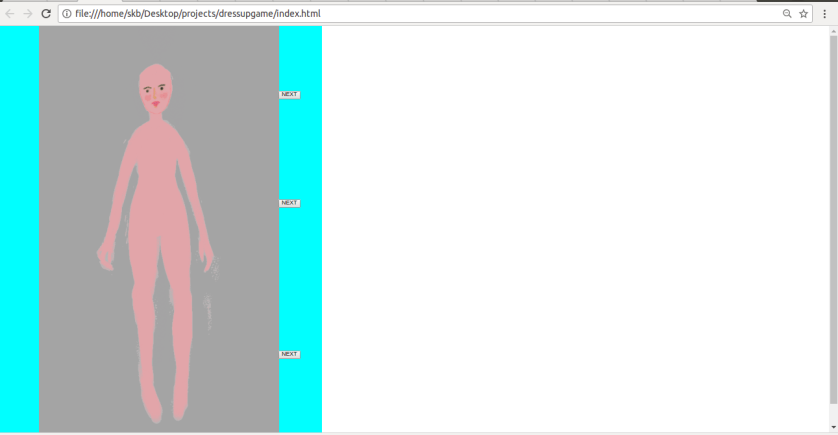
On loading the page at this time, the window looked like this:
Part 3: The Javascript :
Since I have only three dresses, three shoes , three hairfronts and one hairback, the code for this was rather simple, but it should work for more number of elements too.
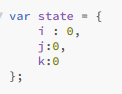
The first thing I did was to create a variable state that would hold the current state of the game ( which elements are on display ). To do this I simply created three variable : i,j,k that would hold the value of the dress, shoes and hair respectively.
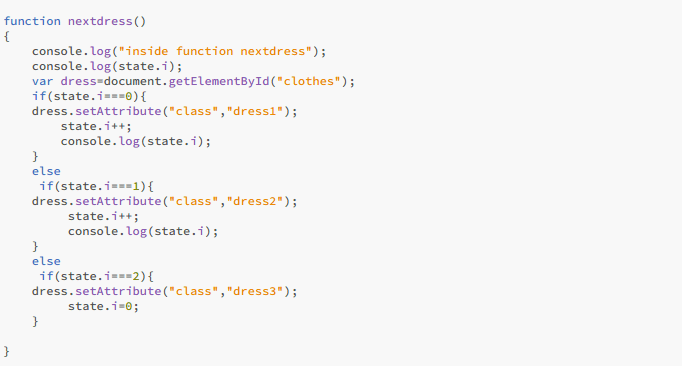
Second I created a funtion nextdress() that would display a different dress and update the variable state.i after that. It simply increments i by 1 and changes the class of the clothes div. Once the variable i becomes two it resets i to 0 and then clicking the next button repeats the whole thing again.
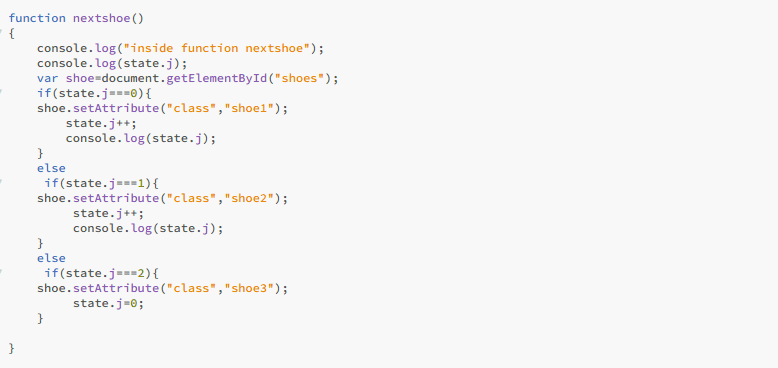
I repeated the same for the function nextshoe()
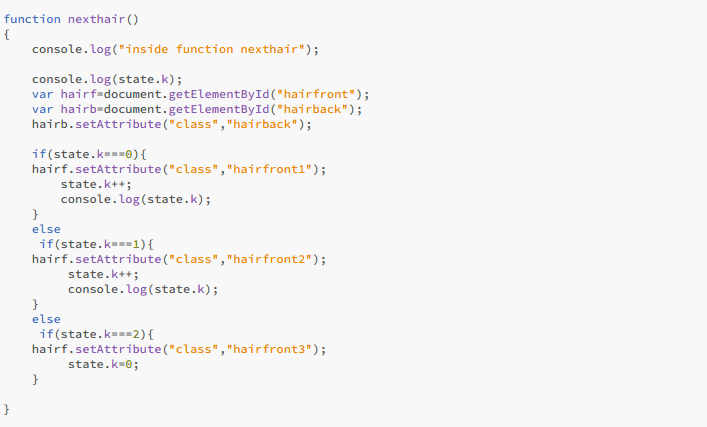
I did the same for the function nexthair() too, but in this case I set the class of the div with id hairback to its appropriate value so that hairback would display once the button was clicked and subsequently clicking the next button would change only the hairfront. I did this because I had only one hairback image, but you could easily create another function and button for hairback if you have more images.
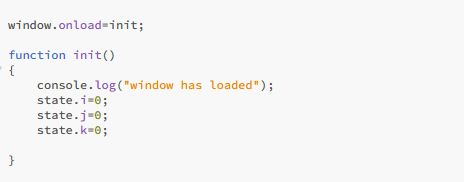
Lastly I decided to give i,j,k some default values once the window had loaded.
The Test Drive
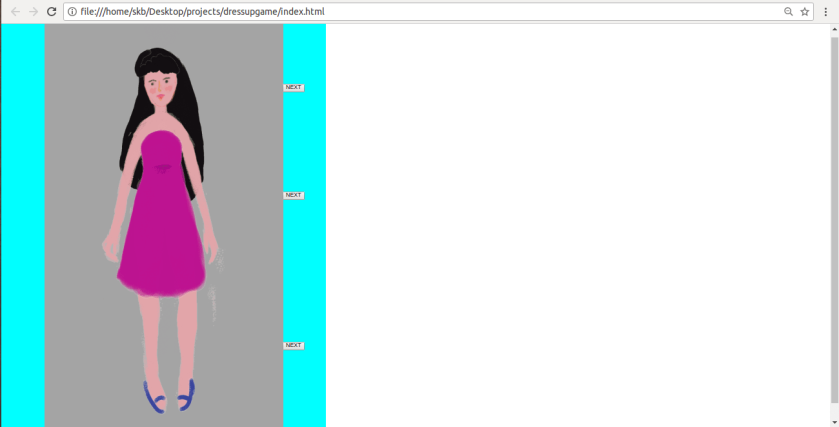
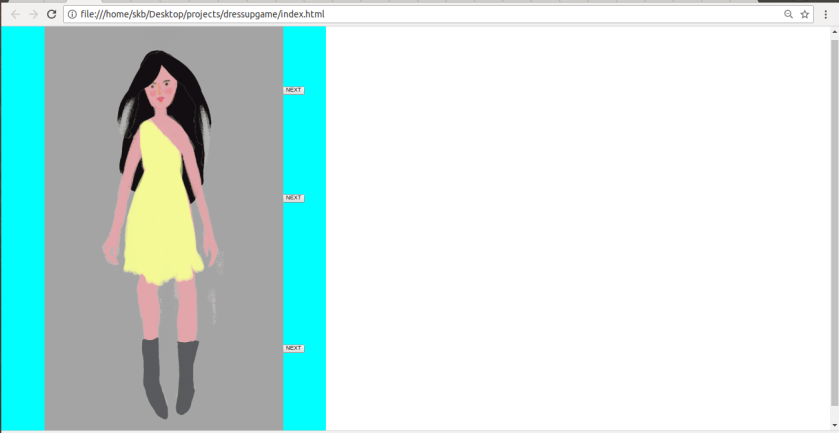
After all this the code works fine, and we have ourselves a dressup game that runs in a browser!
To check for errors, I simply print statements to console.log() and its a pretty helpful way to check for errors along the way
To access console.log simply go to your browser’s developer tools and click on console.
Try it yourself
In case you’d like to try to recreate this game by yourself, here’s a link to the github repository where I’ve included the HTML,CSS and JAVASCRIPT files along with the images that I made for this purpose.
Thank you for reading this blog, and have fun coding!
If you have any questions/feedback do let me know in the comments and I will try to get back to you as soon as I can. 🙂

hello, thank you for useful post and learn me to how to do this.
LikeLike
Thank you so much!
LikeLike
Thank you for the tutorial, it was very helpful!
LikeLike